How to use Finance 360
Before starting
In order to use Finance 360, you should have Excel 2013 or later. If you use the 2013 version, it may be necessary for you to first install the PowerQuery add-in; this is included in Excel 2016.
Installing PowerQuery is very simple – just click the link below, choose your language, and then click the “Download” button.
https://www.microsoft.com/fr-ca/download/details.aspx?id=39379
Find the file you have just downloaded, double-click it, and simply follow the installation instructions.
Now, go through the following steps in order to start using your financial dashboard.
Steps for setting up Finance 360
1. On the C: drive, create a folder named Adnia Finance 360. Use this exact name, keeping the capitalization and spacing exactly the same.
2. Into this folder, download the Finance 360 file that you have purchased. Do not, under any circumstances, modify the name of this file.
3. By default, the Avantage software is installed in the folder C:Program FilesAvantage. Check in this folder for the folder relating to your company. The name of this folder is usually composed of 3 letters and 2 numbers – for example: AVA01.
4. In the folder relating to your company, you will find three files: JOURNA and LIVRE. Copy these files and paste them into the folder C:Adnia Finance 360 that you have created in step 1.
It is important to note that your file must be in Excel (* .xlsx) format.
5. Open the file Finance 360 using Excel 2013 or later.
Parameters
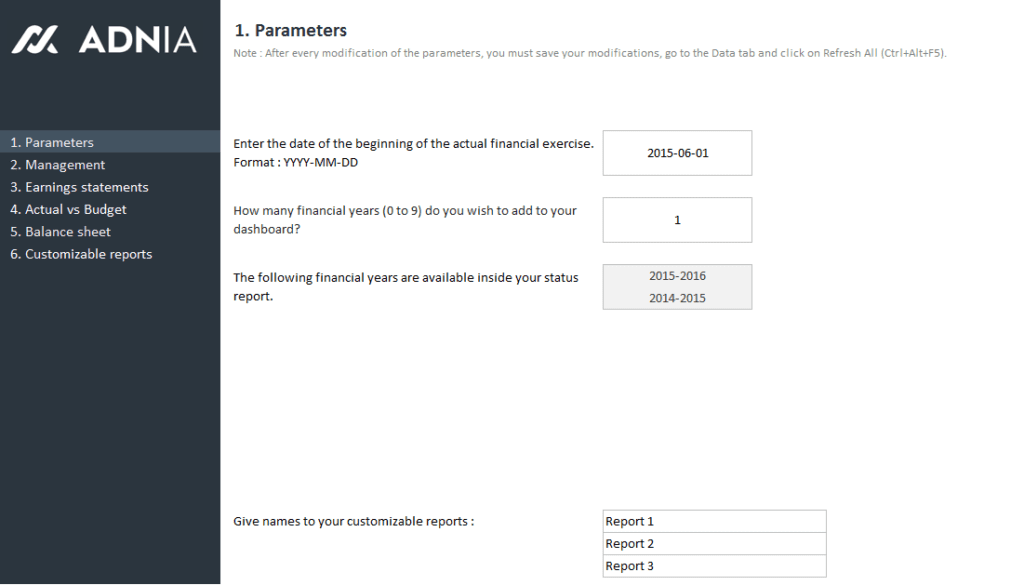
6. In the Excel file, select the Parameters page and enter the start date of the current fiscal year in the format YYYY-MM-DD.
7. On the same page, specify how many years of financial data you wish to add to Finance 360. Don’t forget to copy all financial history files into the folder C:Adnia Finance 360 (step 4).
8. On the Settings page, you can also change the names of your customized reports.
P.S. For understand how the application running, the files JOURNA, JOURNA-HISTO and BOOK application files, we have provided an example. You can copy them to the directory mentioned in step 4. However, it is important to remove them from the directory when you want to set up your “Advantage” data. In addition, a “Pilotage.txt” file is provided for the Management pane of the application. Simply open the file and click on the CTRL-A buttons to select all the contents of the file, CTRL-C to copy the selection and CTRL-V in the control grid of the application.
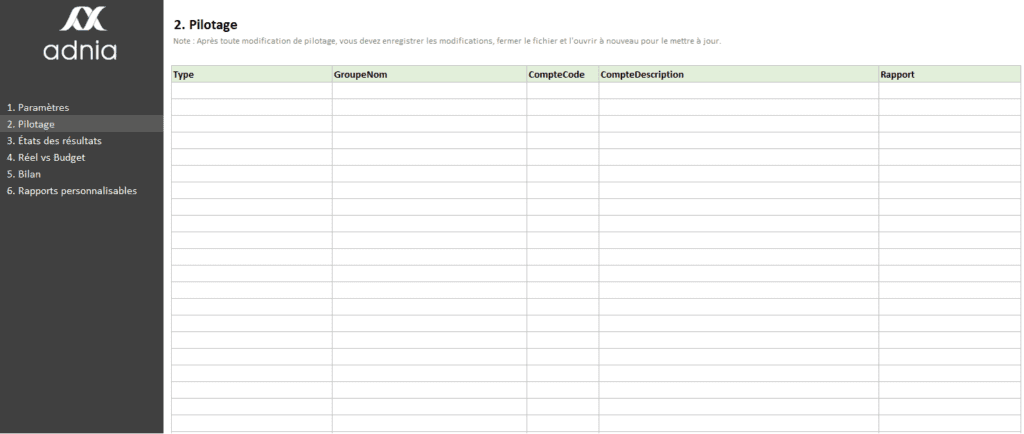
Management
P.S. Dans le but de bien comprendre le fonctionnement de l’application des fichiers JOURNA, JOURNA-HISTO et LIVRE ont été fournis à titre d’exemple. Vous pouvez les copier dans le répertoire mentionné à l’étape 4. Cependant, il est important de les enlever du répertoire lorsque vous voudrez instaurer vos données « Avantage ». De plus, un fichier « Pilotage.txt » vous est fourni pour le volet Pilotage de l’application. Il suffit d’ouvrir le fichier et cliquer sur les boutons CTRL-A pour sélectionner tout le contenu du fichier, CTRL-C pour copier la sélection et CTRL-V dans la grille de pilotage de l’application.
9. Open the Management page. Leave the Finance 360 file open, and also open the LIVRE file that you have copied into C:Adnia Finance 360 (step 4).
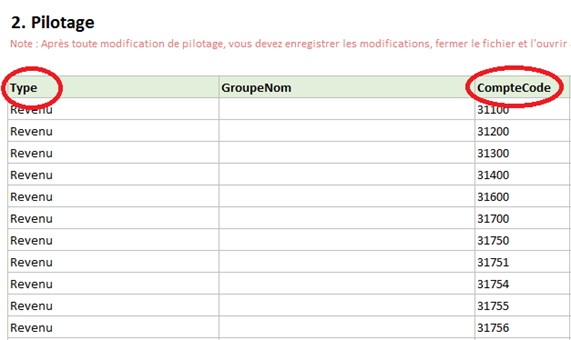
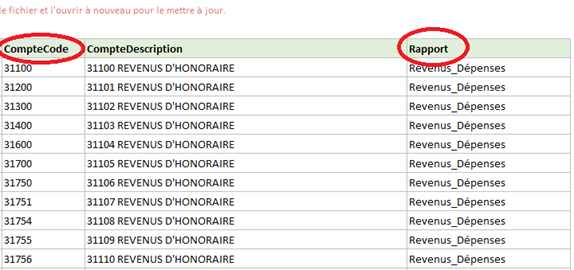
10. In the LIVRE file, copy the data from the columns LNUM and LNOM. Go back to the file Finance 360 and, on the Management page, paste the data, as text, into the columns Account Code et Account Description, respectively. You can now close the file LIVRE.
11. In the Type column, you should select the type of account associated with the account code, for example: Revenues, Expenses, 01-Assets, 02-Capital-Assets, 03-Liabilities, 04-Capital, etc. If you copy the information in this section, be sure to follow the suggested choices. Otherwise, the application will not be functional.
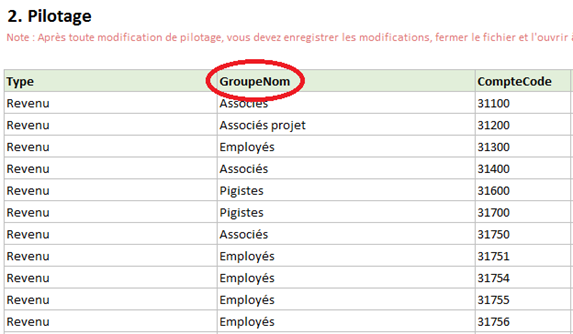
12. Also choose names for different account groups under the column Group Name. For example: Employees, Freelancers, Accounting, Operating costs, etc.
13. To complete the Management page, under the column Report, associate the account codes (Account Code) with one of the three types of reports: Revenues_Expenses, Balance_sheet, or Earnings_statements. If you copy the information in this section, be sure to follow the suggested choices. Otherwise, the application will not be functional.
14. Save your changes, close the file Finance 360, and open it again to update it.
15. Click inside a pivot table (any one, such as the balance sheet), choose the tab “Data”, and click on “Refresh all”. This may take a few minutes.
If you do not receive any error messages, then you are ready to start using your financial dashboard.
If you have any questions or encounter any technical problems, please contact us by email at [email protected].
How to produce a financial history file with Avantage data
The Avantage software only stores two fiscal years of data (the current year and the previous year). If you wish to add more than two fiscal years of data to Finance 360, you will need to manually create a file with the historical data. Here are the steps to follow in order to create such a file:
1. The software automatically generates a file named JOURNA. This file is usually located in the folder C:Program FilesAvantageAVXXX. It is in this file that you will find the financial data from the current and previous fiscal years. It is vital that, prior to the start of a new fiscal year in Avantage, you create a copy of the JOURNA file in order to save your historical data.
If you have not saved your historical data, it is important to know that you can try to have a copy made of your data. Contact Avantage for more details.
2. If you only have one historical file, you should rename it JOURNA – HISTO, and copy it into the folder C:Adnia Finance 360. If you have not yet created this folder, please return to the tutorial for more information.
If, however, you have several historical data files, then you should take the most recent one and rename it JOURNA – HISTO. Afterwards, you should copy the data from the other files and paste this data into the file that you have just renamed, because Finance 360 recognizes only a single JOURNA – HISTO file.
Note: You should paste the historical data in order, in the same tab of the JOURNA – HISTO file. For example, if your 2014 financial data fills lines 2 to 300, you should paste your 2015 data starting from line 301, without the headings from the original file.
After you have finished transferring your data to the JOURNA – HISTO file, you can place this file in the C:Adnia Finance 360 folder and then continue the tutorial from step 5.

